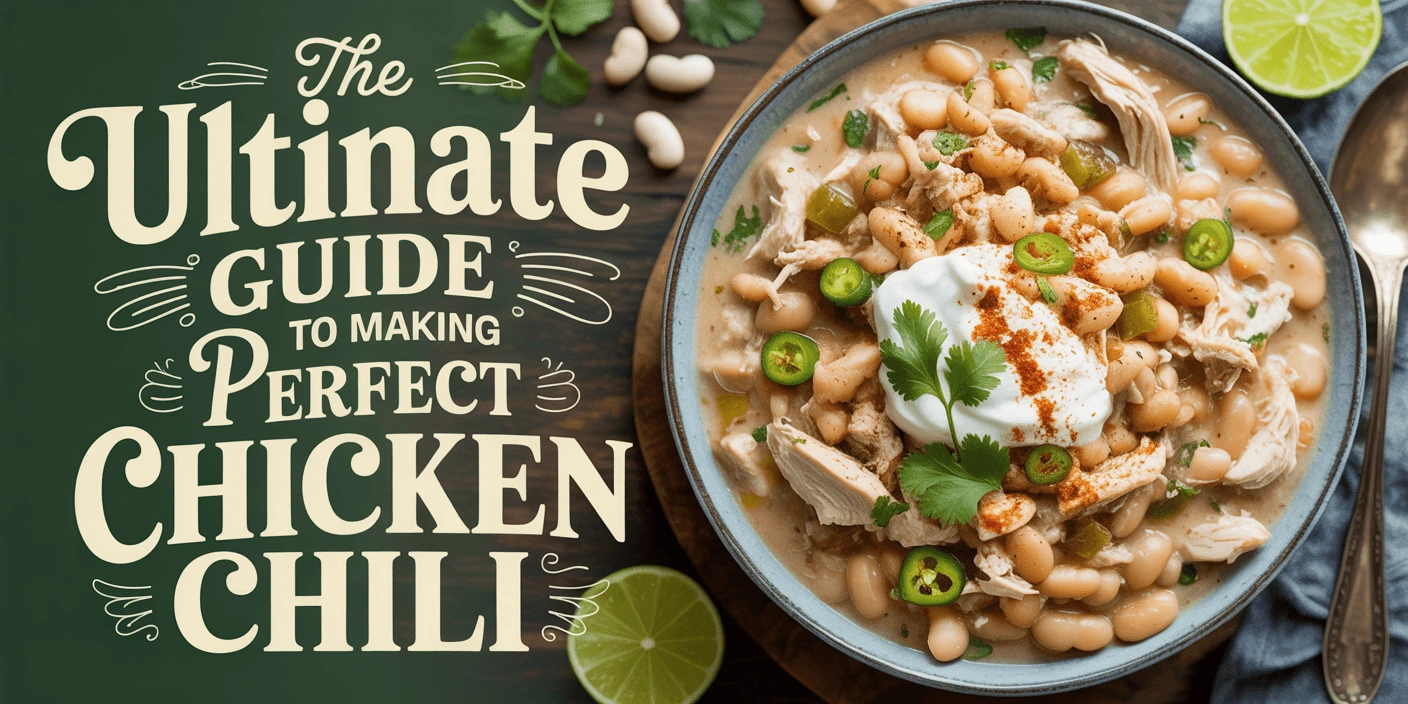
Introduction
When the temperature drops and comfort food cravings strike, there’s nothing quite like a steaming bowl of White Chicken Chili to warm both body and soul. Unlike its tomato-based cousin, this Southwestern-inspired dish offers a creamy, milder alternative that’s equally satisfying but distinctively different. What makes this particular recipe stand out is its perfect balance of tender chicken, creamy white beans, and a harmonious blend of spices that create layers of flavor without overwhelming heat. Whether you’re hosting a casual gathering, meal prepping for the week, or simply craving something hearty yet refreshing, this healthy White Chicken Chili delivers exceptional taste while keeping nutrition in mind. The beauty of this one-pot wonder lies in its simplicity—ready in just 30 minutes—without sacrificing depth of flavor. With protein-packed chicken and fiber-rich beans forming the foundation, this chili offers a nutritious alternative to traditional red chili while still providing that comforting, stick-to-your-ribs satisfaction we all crave during cooler months. Its versatility also means you can easily adjust the spice level, creaminess, and toppings to suit your personal preferences, making it a crowd-pleaser for diverse palates and dietary needs.
Ingredients
The Base:
- 1½ pounds boneless, skinless chicken breasts (can substitute thighs for more flavor)
- 2 tablespoons olive oil, divided
- 1 large yellow onion, diced (about 1½ cups)
- 4-5 cloves garlic, minced (about 2 tablespoons)
- 2 medium poblano peppers, seeds removed and diced
- 1 jalapeño pepper, seeds and ribs removed, finely diced (leave some seeds for extra heat if desired)
- 1 tablespoon ground cumin
- 2 teaspoons dried oregano
- 1½ teaspoons ground coriander
- 1 teaspoon ancho chili powder
- ½ teaspoon white pepper
- ¼ teaspoon cayenne pepper (adjust to taste)
- 4 cups low-sodium chicken broth
- 3 (15-ounce) cans white beans (Great Northern or cannellini), drained and rinsed
- 1 (4-ounce) can diced green chilies, mild or hot depending on preference
For Creaminess:
- 1 cup half-and-half or heavy cream (substitute with coconut cream for dairy-free option)
- 8 ounces cream cheese, softened and cubed (optional for extra creaminess)
- 1 cup corn kernels, fresh or frozen
For Finishing:
- Juice of 2 medium limes (about ¼ cup)
- ½ cup fresh cilantro, chopped
- Salt and freshly ground black pepper, to taste
Suggested Toppings:
- Sliced avocado
- Extra fresh cilantro
- Shredded Monterey Jack or white cheddar cheese
- Thinly sliced jalapeños
- Sour cream or Greek yogurt
- Crushed tortilla chips
- Lime wedges
Step-by-Step Instructions
Preparing the Chicken and Aromatics
1. Season the chicken: Pat the chicken breasts dry with paper towels. Season generously on both sides with salt and freshly ground black pepper. This seemingly simple step is crucial as it builds the first layer of flavor.
2. Sear the chicken: Heat 1 tablespoon of olive oil in a large Dutch oven or heavy-bottomed pot over medium-high heat until shimmering. Add the chicken breasts and sear until golden brown, about 3-4 minutes per side. You’re not trying to cook them through at this point—just developing flavor through caramelization. Transfer the chicken to a clean plate and set aside.
3. Sauté the aromatics: In the same pot, add the remaining tablespoon of olive oil. Reduce heat to medium and add the diced onions with a pinch of salt. Cook until softened and translucent, about 4-5 minutes, scraping up any flavorful browned bits from the chicken.
4. Add the peppers: Add the diced poblanos and jalapeño to the onions. Cook for another 3-4 minutes until they begin to soften. The poblanos provide earthy flavor while the jalapeño brings controlled heat to the White Chicken Chili.
5. Incorporate garlic and spices: Add the minced garlic and cook just until fragrant, about 30 seconds—be careful not to brown it as it can become bitter. Immediately add all the spices (cumin, oregano, coriander, ancho chili powder, white pepper, and cayenne). Toast the spices for 60 seconds, stirring constantly. This blooms the spices, releasing their essential oils and intensifying their flavors.
Building the Chili Base
6. Create the liquid base: Pour in the chicken broth, using it to deglaze the pot. Scrape up any spices or aromatics that have stuck to the bottom—these caramelized bits contain concentrated flavor.
7. Return the chicken: Place the seared chicken breasts back into the pot, ensuring they’re mostly submerged in the liquid. Bring the mixture to a simmer, then reduce heat to maintain a gentle simmer. Cover partially with a lid and cook for about 15 minutes, or until the chicken registers 165°F (74°C) on an instant-read thermometer.
8. Shred the chicken: Once cooked through, remove the chicken breasts to a cutting board. Using two forks, shred the chicken into bite-sized pieces. The warm chicken will shred easily and absorb flavors better than larger chunks.
9. Add beans and chilies: While the chicken is being shredded, add the drained and rinsed white beans and the can of diced green chilies to the pot. Simmer uncovered for 5 minutes to allow the flavors to meld.
10. Return chicken and add corn: Add the shredded chicken back to the pot along with the corn kernels. Simmer for another 5 minutes to heat everything through. The combination of tender chicken, creamy beans, and sweet corn creates the signature texture profile of this healthy white chicken chili.
Final Touches for Creaminess and Flavor Balance
11. Add creaminess: Reduce heat to low. Stir in the half-and-half or heavy cream slowly to prevent curdling. If using cream cheese, add it in small chunks, stirring until completely melted and incorporated. This creates the signature creaminess without making the chili too heavy.
12. Brighten with acidity: Stir in the lime juice—this crucial step brightens all the flavors and balances the richness of the cream elements.
13. Final seasoning: Add the fresh cilantro, reserving some for garnish if desired. Taste and adjust seasoning with salt and pepper as needed. If you want more heat, add a dash more cayenne or some hot sauce.
14. Rest briefly: Allow the chili to rest for 5 minutes off the heat before serving. This resting period allows the flavors to fully develop and marry together.
15. Serve: Ladle the chili into bowls and invite everyone to customize their portions with their preferred toppings from the suggested list.
Tips for Success
Temperature Management
- Keep the heat at medium-low when adding dairy components to prevent curdling. If your chili is too hot, let it cool slightly before adding cream or cheese.
- For meal prep, cool the chili completely before refrigerating. The fat will rise to the top when chilled—simply stir it back in when reheating.
Texture Perfection
- For a thicker chili, mash about one-third of the beans before adding them to the pot. This natural thickening method adds body without additional starch.
- Conversely, if your chili becomes too thick, thin it with additional chicken broth, adding ¼ cup at a time until you reach your desired consistency.
- The chili will thicken as it cools, so if serving later, make it slightly thinner than your preferred final consistency.
Flavor Enhancements
- Toast whole cumin seeds in a dry pan until fragrant, then grind them yourself for more intense flavor than pre-ground cumin.
- For deeper flavor development, consider making this chili a day ahead—like many soups and stews, the flavors intensify overnight.
- Roast the poblano peppers over an open flame or under the broiler until blackened, then peel, seed, and dice for a smoky dimension.
Equipment Recommendations
- Use a heavy-bottomed Dutch oven for even heat distribution and to prevent burning.
- An instant-read thermometer ensures perfectly cooked chicken without guesswork.
- If using an Instant Pot, sear the chicken and sauté vegetables using the sauté function, then pressure cook on high for 10 minutes with a 10-minute natural release.
Storage
White chicken chili stores beautifully, often tasting even better the next day as the flavors continue to develop. To properly store leftovers, allow the chili to cool completely at room temperature for no more than two hours before transferring to airtight containers. Refrigerated chili will maintain its quality for up to 4 days.
For longer storage, freeze the chili in portion-sized containers or heavy-duty freezer bags for up to 3 months. Be sure to leave about an inch of headspace to allow for expansion during freezing. For best texture, freeze the chili before adding dairy components, then add fresh cream when reheating.
When reheating, thaw overnight in the refrigerator if frozen, then warm gently over medium-low heat, stirring occasionally to prevent scorching. Add a splash of broth if needed to restore the original consistency. Microwave reheating works in a pinch—use medium power and stir every minute until heated through. The chili is properly reheated when it reaches 165°F (74°C) throughout.
Variations
Dietary Adaptations
- Dairy-Free: Replace cream with full-fat coconut milk and omit cream cheese. The coconut adds subtle sweetness that complements the spices beautifully.
- Gluten-Free: This recipe is naturally gluten-free, but always verify your chicken broth and spice blends are certified gluten-free if serving to someone with celiac disease.
- Vegetarian Option: Substitute the chicken with an additional can of beans plus 2 cups of diced mushrooms (portobello or cremini work well) sautéed until golden for meaty texture.
- Lower-Carb Version: Reduce beans to one can and add extra chicken plus 2 cups of diced zucchini or cauliflower florets added in the last 10 minutes of cooking.
Flavor Variations
- Verde Style: Replace the diced green chilies with 1 cup of salsa verde for a tangier profile with additional depth.
- Smoky Twist: Add 1 teaspoon of smoked paprika and use fire-roasted green chilies for a subtle smokiness that evokes outdoor cooking.
- Beer-Infused: Replace 1 cup of the chicken broth with a light Mexican beer for complex maltiness that complements the chilies.
- Extra Hearty: Add ½ cup uncooked quinoa with the broth for added protein and texture. You may need to add an extra cup of liquid to accommodate the quinoa’s absorption.
Spice Level Adjustments
- Mild Version: Omit the cayenne and jalapeño, using only the mild green chilies for gentle flavor.
- Fire-Breather’s Delight: Add a diced habanero or serrano pepper with seeds, plus ½ teaspoon of crushed red pepper flakes for serious heat enthusiasts.
Frequently Asked Questions
Can I make this in a slow cooker?
Absolutely! Sear the chicken and sauté the aromatics and spices as directed, then transfer everything except the dairy, lime juice, and cilantro to your slow cooker. Cook on low for 6-7 hours or high for 3-4 hours. Remove the chicken to shred, then return it to the pot along with the dairy components, lime juice, and cilantro in the last 30 minutes of cooking.
Why is my white chicken chili too thin?
This could happen if your beans break down too much or if excess liquid wasn’t reduced enough. To thicken it, create a slurry with 2 tablespoons of cornstarch and 2 tablespoons of cold water. Stir this into the simmering chili and cook for an additional 5-10 minutes until thickened.
Can I use rotisserie chicken to save time?
Yes! Skip the chicken searing steps and add about 4 cups of shredded rotisserie chicken when you would normally return the shredded chicken to the pot. This saves about 20 minutes of preparation time.
Is white chicken chili spicy?
This recipe as written has a moderate heat level. You can easily adjust by changing the amount of jalapeño, cayenne, or green chilies to suit your preference.
How can I make this chili in advance for a party?
Prepare the recipe through step 10, but don’t add the dairy components. Refrigerate for up to 2 days. When ready to serve, reheat gently, then proceed with adding the cream, cream cheese, lime juice, and fresh herbs.
Conclusion
There’s something uniquely satisfying about a steaming bowl of White Chicken Chili that sets it apart from traditional chili varieties. Its creamy texture, complex flavor profile, and beautiful balance of protein, vegetables, and spices make it both comforting and nourishing. Whether you’re serving it for a casual family dinner, preparing it for meal prep, or showcasing it at your next gathering, this versatile one-pot wonder is sure to impress.
What makes this healthy white chicken chili particularly special is its adaptability. The core recipe provides a solid foundation while leaving room for personalization through toppings and variations. From the first aromatic step of searing the chicken to the final sprinkle of fresh cilantro, every element contributes to a cohesive dish that feels both familiar and exciting.
We’d love to hear how this recipe turns out for you! Did you try any of the suggested variations? Did you discover a new topping combination that takes it to the next level? Share your experience in the comments below, tag us in your social media posts, or leave a rating to help other home cooks. And remember, the best recipes are those that evolve through sharing and community—so don’t hesitate to make this chili your own and pass it along to friends and family who appreciate good food made with care.