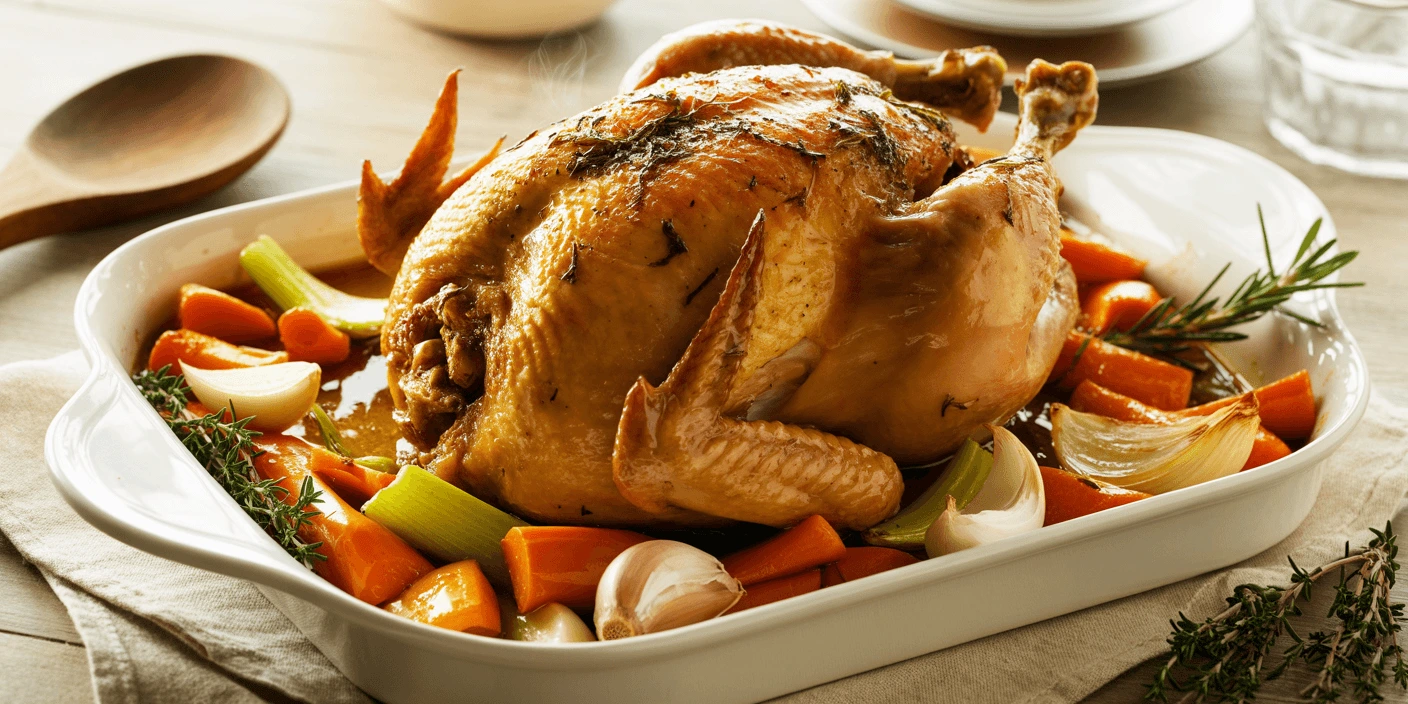
This dry brine roast chicken recipe is the only one you’ll ever need. I’ve roasted a lot of chickens over the years — some pale and rubbery, some golden and perfect. The difference wasn’t talent. It was technique. Once I understood the three things that actually matter (dry skin, high heat, and proper rest), every single roast chicken came out of the oven with shatteringly crispy skin and meat so juicy it practically carved itself. It uses a dry brine method that takes just 5 minutes the night before and delivers restaurant-quality results every time.
Why This Method Works Better Than Others
Most roast chicken recipes give you a list of ingredients. This one gives you the science behind why each step works — because when you understand the why, you’ll nail it every time.
Dry brining — salting the chicken uncovered in the fridge for 24 hours — draws moisture to the surface, then reabsorbs it as a concentrated natural brine that seasons the meat all the way through. More importantly, it dries the skin completely. As the team at America’s Test Kitchen explains, a drier surface is essential for the Maillard reaction — the chemical process that creates that golden, crackling crust everyone is after.
Initial high-heat blast at 425°F (218°C) for the first 15 minutes sets the crust and renders the fat under the skin before you drop the temperature to finish cooking gently.
Mandatory resting for 20 minutes lets the juices redistribute through the meat. Skip this step and all that moisture runs out onto your cutting board instead of staying in the chicken.
Dry brine roast chicken Ingredients
(Serves 4–6)
The chicken:
- 1 whole chicken, 3–5 lb / 1.5–2.3 kg (air-chilled, free-range if possible)
- 1 tablespoon fine kosher salt (for dry brining)
- 1 teaspoon black pepper
- 1 teaspoon sweet paprika
- 2 tablespoons olive oil
For the cavity:
- 4 garlic cloves, crushed
- 1 lemon, quartered
- A few sprigs of fresh thyme or rosemary
Optional vegetables for the roasting pan:
- 2 onions, roughly chopped
- 3 carrots, cut into large chunks
- 3–4 potatoes, halved
How to Make Dry Brine Roast Chicken (Step by Step)
Step 1 — Dry brine (24 hours ahead)
The day before cooking, pat the chicken completely dry with paper towels — every inch, inside and out. Mix the salt, pepper, and paprika, then rub the mixture all over the outside and inside the cavity. Place the chicken on a rack set over a tray and leave it uncovered in the fridge overnight. This is the single most important step. The uncovered rest dries the skin down to the point where it will crisp in under 20 minutes of roasting.
Pro tip: No time to dry brine? Pat the chicken as dry as possible and leave it uncovered in the fridge for at least 1 hour. It won’t be quite as crispy, but it’s still far better than roasting straight from the packet.
Step 2 — Prep before roasting
Take the chicken out of the fridge 30 minutes before roasting — cold chicken straight into a hot oven cooks unevenly. Stuff the cavity loosely with the garlic, lemon, and herbs. Brush the skin all over with olive oil.
Step 3 — High-heat start
Preheat your oven to 425°F / 218°C. Place the vegetables in the bottom of your roasting pan and set the chicken on top — the vegetables act as a natural rack and absorb the drippings. Roast for 15 minutes until the skin starts to turn golden.
Step 4 — Lower the temperature
Without opening the oven door (temperature drops fast), reduce the heat to 375°F / 190°C and continue roasting using the chart below.
Roast chicken temperature and time chart (after the first 15 minutes at 425°F)
| Chicken weight | Time at 375°F | Total oven time |
|---|---|---|
| 3 lb / 1.4 kg | 45–50 min | ~60–65 min |
| 4 lb / 1.8 kg | 60–70 min | ~75–85 min |
| 5 lb / 2.3 kg | 75–85 min | ~90–100 min |
Step 5 — Check for doneness
Insert an instant-read thermometer into the thickest part of the thigh, avoiding the bone. According to USDA food safety guidelines, the safe minimum internal temperature for whole poultry is 165°F / 74°C. The juices should run clear when you pierce the thigh.
Step 6 — Rest (non-negotiable)
Transfer the chicken to a cutting board and tent loosely with foil. Rest for 20 minutes. This is not optional. During this time the internal temperature continues to rise slightly and the juices redistribute through the meat. Carve too early and you’ll lose them all to the board.
Step 7 — Carve and serve
Carve and serve with the roasted vegetables and pan juices. For a quick pan gravy, deglaze the roasting pan with ½ cup of chicken broth over medium heat, scraping up all the caramelized bits. Simmer for 2–3 minutes and pour over the carved chicken.
What to Serve With Dry Brine Roast Chicken
The pan juices and roasted vegetables are already a complete side dish, but these pairings take it to the next level:
- Mashed potatoes — our Caramelized Onion Mashed Potatoes soak up the pan gravy beautifully
- Sheet pan vegetables — our One-Pan Lemon Herb Chicken and Roasted Vegetables uses the same technique and is a great companion
- Crusty bread — essential for mopping up every drop of juice
- A green salad — keeps the meal balanced and fresh
Love chicken dinners but short on time? Our 30-Minute Dinner Guide has weeknight-friendly options for when you don’t have time for a full roast.
Pro Tips for Perfect Results
Choose air-chilled chicken. Air-chilled birds have drier skin from the start, which means crispier results. Water-chilled supermarket chickens have absorbed extra moisture during processing — another reason the dry brine step is so important.
Use a wire rack inside the pan. Elevating the chicken allows hot air to circulate underneath, crisping the bottom skin too. A bed of roughly chopped vegetables works almost as well if you don’t have a rack.
Don’t open the oven door. Every time you open it, the temperature drops by 25–50°F. Trust the chart and your thermometer.
Baste only once. Basting keeps the skin moist — the opposite of what you want. If you must baste for color, do it once in the last 15 minutes with a mix of melted butter and honey.
Season under the skin. Use your fingers to carefully loosen the skin over the breast and thighs and rub salt and butter directly onto the meat. The flavor penetrates better and the skin stays crispy.
Troubleshooting — What Went Wrong?
| Problem | Cause | Solution |
|---|---|---|
| Skin not crispy | Chicken not dry enough | Dry brine uncovered 24h, or pat very dry and rest 1h minimum |
| Breast dry, thighs undercooked | Cold start, uneven cooking | Always bring to room temp 30 min before roasting |
| Vegetables burning | Cut too small, too little liquid | Cut into large chunks, add a splash of chicken broth |
| Chicken not browning | Oven not fully preheated | Preheat 20+ min; use oil not butter (butter burns) |
| Sauce too thin | Pan drippings too liquid | Simmer 5+ min, or add 1 tsp cornstarch dissolved in cold water |
Variations
Lemon-Herb Dry Brine Roast Chicken
Double the lemon — one quartered in the cavity, one sliced and tucked under the skin with extra thyme and rosemary. A classic Mediterranean profile that never gets old.
Garlic-Parmesan Roast Chicken Make a paste with 6 roasted garlic cloves, ¼ cup grated Parmesan, and olive oil. Rub it under the skin before roasting. Rich, deeply savory, impressive for guests. Pairs perfectly with our Chicken and Mushroom recipe for a full Italian-style dinner spread.
Spicy Southwest Roast Chicken Replace the paprika and herbs with cumin, chili powder, oregano, and lime zest. Serve with rice and black beans. Same technique, completely different flavor world.
Spatchcock (Butterflied) Roast Chicken Remove the backbone with kitchen shears and flatten the chicken before roasting. Cuts cooking time by 30% and delivers the most evenly cooked bird you’ve ever had. Serious Eats has the definitive spatchcock guide if you want to go deep on this technique.
BBQ Variation If you’d rather take the chicken outside, our BBQ Chicken Skewers use the same dry seasoning approach on the grill — just as crispy, completely different vibe.
Storage, Leftovers & Homemade Stock
Fridge: Remove meat from the bones within 2 hours of cooking. Store in an airtight container for up to 4 days.
Reheating: Skip the microwave — it steams the skin and makes it rubbery. Place chicken in a covered baking dish with a splash of broth and reheat at 325°F / 165°C for 10–15 minutes.
Freezer: Wrap portions tightly and freeze for up to 3 months. Thaw overnight in the fridge before reheating.
Homemade stock — don’t throw away the carcass: Place the carcass in a large pot with water, 2 carrots, 1 onion, 2 celery stalks, and 2 bay leaves. Simmer for 2–3 hours. Strain and refrigerate for up to 5 days or freeze for 3 months. Far better than anything from a carton — and it costs nothing.
Frequently Asked Questions
How long do you roast a chicken at 375°F?
After an initial 15-minute blast at 425°F, a 3 lb chicken needs 45–50 minutes at 375°F (60–65 min total). A 4 lb chicken needs 60–70 minutes (75–85 min total). A 5 lb chicken needs 75–85 minutes (90–100 min total). Always verify with a thermometer — never rely on time alone.
What temperature should roast chicken be when done?
The USDA recommends a minimum internal temperature of 165°F / 74°C, measured in the thickest part of the thigh without touching the bone. This ensures all harmful bacteria are destroyed.
Why isn’t my chicken skin getting crispy?
Three common culprits: the chicken wasn’t dry enough before roasting (dry brine or pat very dry), your oven wasn’t fully preheated, or you opened the oven door too often. The dry brine method solves the first problem completely.
How can I tell when my chicken is done without a thermometer?
Pierce the thickest part of the thigh — if the juices run clear (not pink), it’s likely done. The legs should also move easily in their sockets. That said, a thermometer is the only truly reliable method.
Do I need to truss the chicken?
Not strictly necessary. Trussing helps the bird cook evenly and keeps its shape, but even tucking the wings under and crossing the legs will improve your results if you don’t have kitchen twine.
Can I stuff my roast chicken?
It’s better not to. Stuffing slows down the cooking, risks uneven temperatures, and often means overcooked breast meat by the time the stuffing is safe. Add aromatics to the cavity instead — garlic, lemon, and herbs give you all the flavor without the food safety risk.
What makes dry brine roast chicken better than other methods?
Wet brining submerges the chicken in salted water, which adds moisture but can dilute flavor and make the skin soggy. Dry brining applies salt directly to the surface, draws out natural juices, then reabsorbs them back into the meat — giving you deeper flavor, crispier skin, and none of the mess.
What should I do with leftover roast chicken?
Shred the meat for sandwiches, tacos, salads, or pasta. Our Creamy Cajun Chicken Pasta is a brilliant way to use leftover chicken. And don’t skip the homemade stock — it’s the best thing you can make from the carcass.
Conclusion
This dry brine roast chicken method is one of the most satisfying things you can cook. It looks impressive, fills the kitchen with an incredible smell, and feeds a crowd without much effort once you understand the method.
Dry the skin. Blast with heat. Rest before carving. That’s the whole secret.
Once you’ve mastered this, the variations are endless. Try it with different herbs and spice rubs, or serve it alongside our creamy Marry Me Chicken sauce for a dinner that genuinely earns its name.
Made it? Leave a rating below and tag us on Instagram @tastydinnerrecipes — we love seeing your roasts!
Want more chicken inspiration? Browse our Boneless Chicken Thighs guide for an everyday alternative, or check our full 30-Minute Dinner Guide for quick weeknight ideas.