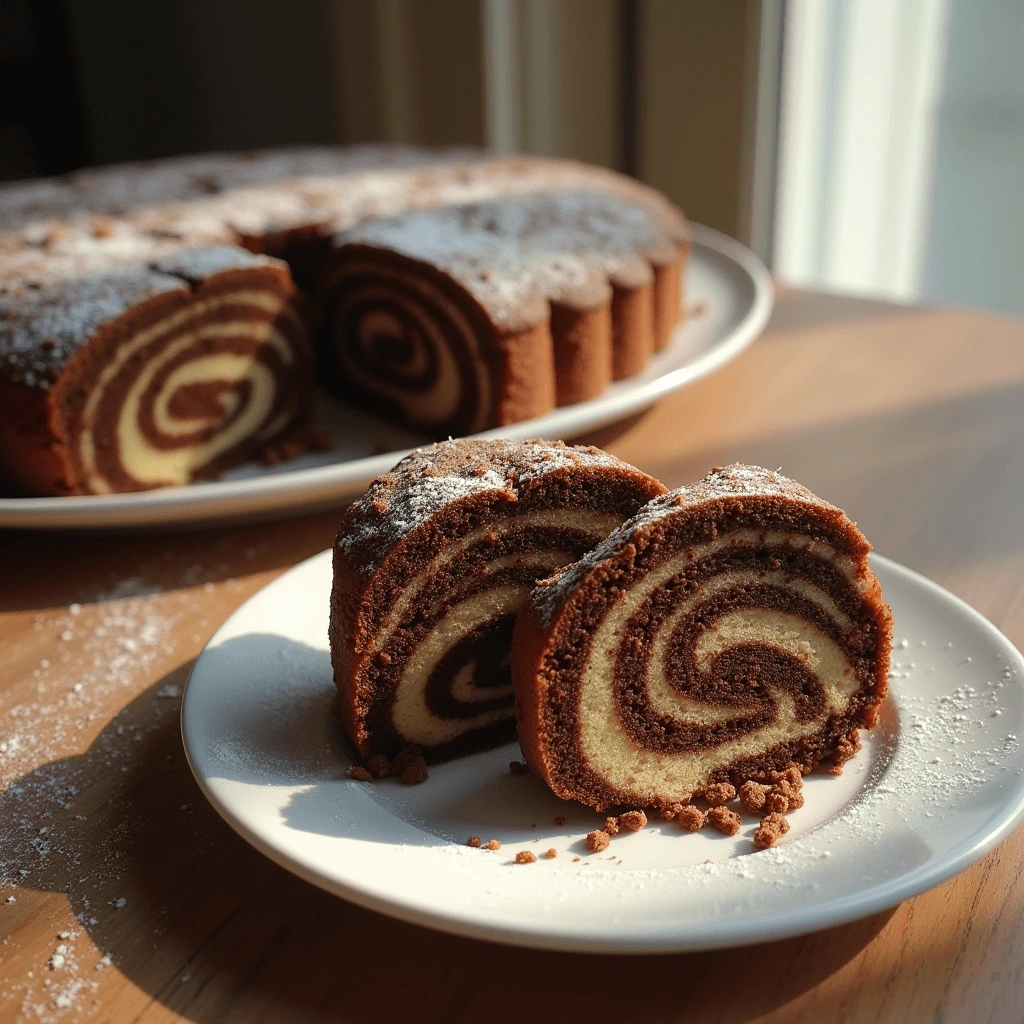
There’s something undeniably charming about the beautiful swirls of a perfectly executed marble cake. This Light Chocolate-Vanilla Marble Cake combines two classic flavors in a delightfully airy, moist texture that satisfies both chocolate lovers and vanilla enthusiasts alike. Whether you’re baking for a special occasion or simply treating yourself on a quiet weekend afternoon, this homemade marble cake recipe strikes the perfect balance between sophistication and simplicity.
Why This Light Marble Cake Will Become Your Go-To Homemade Dessert
In the world of home baking, few recipes are as versatile and universally beloved as a good marble cake. This particular chocolate-vanilla creation offers a lighter alternative to dense, rich cakes without sacrificing flavor or visual appeal. The beautiful marbling effect might look complicated, but this simple recipe makes the process accessible even to novice bakers.
What makes this specific Marble Cake recipe stand out is its remarkably light texture. Unlike many homemade cakes that can be heavy or overly sweet, this recipe uses techniques and ingredients specifically chosen to create a tender, airy crumb that melts in your mouth. The delicate balance of chocolate and vanilla creates a delicious dessert that pairs perfectly with your morning coffee, afternoon tea, or as an after-dinner treat.
The Secret to a Perfect Light Marble Cake Effect in Your Homemade Cake
The mesmerizing swirls that characterize a true marble cake are not just beautiful to look at—they also ensure that each bite offers a unique combination of flavors. Creating this effect is both an art and a science. The key lies in maintaining two distinct batters that have similar consistencies, then combining them with a gentle touch that preserves their individual characteristics while allowing them to blend partially.
In this Light Chocolate-Vanilla Marble Cake recipe, we’ll guide you through the process step by step, sharing professional tips to achieve bakery-worthy results. The contrast between the rich chocolate and delicate vanilla creates not just a visual masterpiece but a tasteful marriage of complementary flavors that has stood the test of time.
Essential Ingredients for Your Light Marble Cake
The Vanilla Batter Base
- 2¼ cups (280g) all-purpose flour
- 1½ cups (300g) granulated sugar
- 3 large eggs, room temperature
- ¾ cup (170g) unsalted butter, softened
- 1 cup (240ml) buttermilk, room temperature
- 2 teaspoons baking powder
- ½ teaspoon baking soda
- ½ teaspoon salt
- 2 teaspoons pure vanilla extract
- 2 tablespoons vegetable oil
The Chocolate Mixture
- ⅓ cup (40g) unsweetened cocoa powder
- 3 tablespoons granulated sugar
- ¼ cup (60ml) hot water
- ½ teaspoon instant coffee powder (optional, enhances chocolate flavor)
The Optional Simple Glaze
- 1 cup (120g) powdered sugar
- 2-3 tablespoons milk or cream
- ½ teaspoon vanilla extract
- 1 tablespoon unsweetened cocoa powder (for chocolate portion)
Step-by-Step Guide to Baking the Perfect Light Marble Cake
Preparing Your Kitchen for Homemade Baking Success
- Preheat your oven to 350°F (175°C).
- Grease and flour a 9×5-inch loaf pan or a 9-inch round cake pan.
- Ensure all refrigerated ingredients have reached room temperature.
- Measure and organize all ingredients before beginning the mixing process.
Creating the Light Vanilla Batter Foundation
- In a medium bowl, whisk together the flour, baking powder, baking soda, and salt. Set aside.
- In a large mixing bowl, cream the softened butter and sugar with an electric mixer on medium speed until light and fluffy, about 3-4 minutes. Don’t rush this step—proper creaming incorporates air for a lighter texture.
- Add eggs one at a time, beating well after each addition.
- Stir in the vanilla extract and vegetable oil.
- Gradually add the dry ingredients to the butter mixture in three portions, alternating with the buttermilk, beginning and ending with the flour mixture. Mix just until combined after each addition.
Preparing the Rich Chocolate Mixture
- In a separate medium bowl, combine cocoa powder, additional sugar, and instant coffee powder (if using).
- Pour in the hot water and stir until smooth and fully dissolved, creating a thick chocolate mixture.
- Allow to cool slightly, about 2 minutes.
- Take approximately one-third of the vanilla batter and add it to the chocolate mixture.
- Gently fold until fully incorporated, being careful not to overmix.
Creating the Signature Marble Effect
- Spoon alternating dollops of vanilla and chocolate batters into the prepared pan.
- Once all batter is in the pan, use a butter knife or skewer to gently swirl through the batters. Make figure-eight or “S” patterns, but avoid overmixing—5-6 passes through the batter is sufficient.
- Tap the pan gently on the counter a few times to release any air bubbles.
Baking Your Homemade Light Marble Cake to Perfection
- Place the pan in the preheated oven, positioning it in the center rack for even heat distribution.
- Bake for 40-45 minutes for a round cake or 50-55 minutes for a loaf cake. The cake is done when a toothpick inserted in the center comes out clean or with a few moist crumbs.
- Allow the cake to cool in the pan for 15 minutes before transferring to a wire rack to cool completely.
Optional: Adding a Simple Drizzle Glaze
- For the vanilla glaze: In a small bowl, whisk together ½ cup powdered sugar, 1 tablespoon milk, and ¼ teaspoon vanilla until smooth.
- For the chocolate glaze: In another bowl, combine the remaining ½ cup powdered sugar, 1 tablespoon cocoa powder, 1 tablespoon milk, and ¼ teaspoon vanilla.
- Adjust consistency as needed by adding more milk or powdered sugar.
- Drizzle the glazes over the cooled cake in alternating patterns.
Expert Tips for Achieving the Perfect Light Marble Cake
- Room temperature ingredients: This ensures proper emulsification for a lighter texture.
- Don’t overmix: Once you add flour, mix just until combined to avoid developing gluten, which can make your cake tough.
- Measure flour correctly: Spoon flour into measuring cups and level with a knife instead of scooping directly with the measuring cup.
- Check for doneness carefully: An overbaked cake will be dry, while an underbaked one will sink in the middle.
Common Light Marble Cake Variations for the Home Baker
- Citrus Twist: Add 1 tablespoon of lemon or orange zest to the vanilla batter for a refreshing flavor.
- Almond Accent: Replace vanilla extract with almond extract in the vanilla portion.
- Mocha Marvel: Double the coffee powder in the chocolate portion for a more pronounced mocha flavor.
- Berry Beautiful: Fold 1 cup of fresh berries into the vanilla batter before creating the marble effect.
Storage Recommendations for Your Homemade Dessert
- Room Temperature: Store in an airtight container for up to 3 days.
- Refrigeration: Extends freshness to 5-7 days, but may slightly affect texture.
- Freezing: Wrap tightly in plastic wrap, then aluminum foil, and freeze for up to 3 months.
Serving Suggestions for Your Light Marble Cake Creation
This versatile homemade dessert can be presented in numerous ways:
- Dust with powdered sugar for a simple, elegant finish
- Serve slices with a dollop of lightly whipped cream and fresh berries
- Pair with coffee for breakfast or brunch
- Transform into a more decadent dessert with a scoop of vanilla ice cream
- Cut into small cubes for an attractive addition to a dessert buffet
The beauty of this Light Chocolate-Vanilla Marble Cake lies in its adaptability. It’s equally at home at a casual gathering or dressed up for a more formal occasion.
Nutritional Information and Dietary Adaptations
Approximate Nutritional Profile (per slice, based on 12 servings)
- Calories: 320 kcal
- Protein: 5g
- Carbohydrates: 45g
- Fat: 14g
- Fiber: 1g
- Sugar: 28g
Adapting This Marble Cake Recipe for Dietary Needs
- Gluten-Free: Substitute a 1:1 gluten-free flour blend for the all-purpose flour.
- Dairy-Free: Use plant-based butter and substitute the buttermilk with a mixture of dairy-free milk and 1 tablespoon vinegar.
- Reduced Sugar: Decrease sugar by up to 25% without significantly affecting texture.
- Egg Substitute: For each egg, substitute ¼ cup unsweetened applesauce or a commercial egg replacer.
Frequently Asked Questions About Light Marble Cake
Why Did My Light Marble Cake Turn Out Dry?
Dry cake usually results from one of three issues: overbaking, incorrect flour measurement, or overmixing after adding flour. Use a timer, measure flour by spooning it into measuring cups rather than scooping, and mix just until ingredients are combined after adding flour.
Can I Make This Light Marble Cake in Advance?
Absolutely! This cake actually develops deeper flavors after a day. You can bake it 1-2 days before serving and store it in an airtight container at room temperature. If you’re planning further ahead, you can freeze the unglazed cake for up to 3 months.
Why Did My Marble Effect Disappear?
If your swirls are not visible after baking, you likely overmixed when creating the marble effect. The key is to make only 5-6 passes through the batter with your knife or skewer. Too much swirling will blend the batters completely rather than creating distinct swirls.
Can I Use This Recipe for Cupcakes or Mini Loaves?
Yes! This versatile recipe works beautifully for cupcakes (bake for 18-22 minutes) or mini loaves (bake for 25-30 minutes). The marble effect in smaller formats creates unique patterns in each portion.
If you enjoyed this recipe, be sure to explore more.
How Can I Make Sure My Marble Cake Has a Light Texture?
The keys to achieving a light texture are: properly creaming the butter and sugar (beat for a full 3-4 minutes), using room temperature ingredients, adding the eggs one at a time, and being careful not to overmix once you add the flour.
Why Does the Recipe Call for Buttermilk?
Buttermilk serves multiple purposes in this recipe. Its acidity activates the baking soda, helping the cake rise. It also breaks down gluten, resulting in a more tender crumb, and adds moisture that helps keep the cake fresh longer.
Can I Use Dutch-Processed Cocoa Instead of Regular Cocoa Powder?
While Dutch-processed cocoa will work, it may result in a slightly less pronounced rise in the chocolate portions since it’s less acidic than natural cocoa powder. If using Dutch-processed cocoa, add ⅛ teaspoon of cream of tartar to the chocolate mixture to add back some acidity.
My Cake Has a Dome Instead of a Flat Top. What Happened?
A pronounced dome typically indicates that your oven temperature is too high or that the cake is positioned too high in the oven. Consider using an oven thermometer to verify temperature accuracy and place the cake in the middle rack for more even baking.
Why This Light Marble Cake Stands Out
The beauty of this Light Chocolate-Vanilla Marble Cake lies in its perfect balance—it’s indulgent enough to satisfy a sweet craving yet light enough to enjoy without feeling overwhelmed. The marbling technique creates a dessert that’s as pleasing to the eye as it is to the palate, making it an impressive addition to your homemade dessert repertoire.
What truly sets this recipe apart is its accessibility. Despite its professional appearance, this simple recipe is achievable for bakers of all skill levels. The step-by-step instructions ensure success, while the room for creative variations means you can make this recipe your own.
Whether you’re baking for a special occasion or simply treating yourself to a homemade delight, this Light Chocolate-Vanilla Marble Cake delivers both visual appeal and delicious flavor in every slice. The perfect harmony of chocolate and vanilla, wrapped in a light, moist crumb, creates a timeless classic that will earn a permanent place in your collection of favorite recipes.
So preheat your oven, gather your ingredients, and prepare to create a homemade dessert that will impress family and friends alike. With this marble cake recipe in your arsenal, you’re always just a few simple steps away from baking magic.
Show us your masterpiece
[email protected] #MarbleCakeMagic for a chance to be featured.